반응형
Query DSL게시글은 대부분 인프런의 김영한님의 강의인 '실전! Query DSL' 기반으로 내용을 정리했습니다.
Query DSL 설정과 검증
build.gradle 설정
- build.grable에 Query DSL 라이브러리 및 설정 추가
buildscript {
   ext {
      queryDslVersion = "5.0.0"
   }
}

plugins {
   id 'org.springframework.boot' version '2.7.2'
   id 'io.spring.dependency-management' version '1.0.12.RELEASE'
   // querydsl 추가
   id "com.ewerk.gradle.plugins.querydsl" version "1.0.10"
   id 'java'
}

group = 'study'
version = '0.0.1-SNAPSHOT'
sourceCompatibility = '11'

configurations {
   compileOnly {
      extendsFrom annotationProcessor
   }
}

repositories {
   mavenCentral()
}

dependencies {
   implementation 'org.springframework.boot:spring-boot-starter-data-jpa'
   implementation 'org.springframework.boot:spring-boot-starter-web'
   compileOnly 'org.projectlombok:lombok'
   runtimeOnly 'com.h2database:h2'
   annotationProcessor 'org.projectlombok:lombok'
   testImplementation 'org.springframework.boot:spring-boot-starter-test'
   //querydsl 추가
   implementation "com.querydsl:querydsl-jpa:${queryDslVersion}"
   annotationProcessor "com.querydsl:querydsl-apt:${queryDslVersion}"
   //테스트에서 lombok 사용
   testCompileOnly 'org.projectlombok:lombok'
   testImplementation('org.springframework.boot:spring-boot-starter-test') {
      exclude group: 'org.junit.vintage', module: 'junit-vintage-engine'
   }
}

tasks.named('test') {
   useJUnitPlatform()
}

//querydsl 추가 시작
def querydslDir = "$buildDir/generated/querydsl"
querydsl {
   jpa = true
   querydslSourcesDir = querydslDir
}
sourceSets {
   main.java.srcDir querydslDir
}
configurations {
   querydsl.extendsFrom compileClasspath
}
compileQuerydsl {
   options.annotationProcessorPath = configurations.querydsl
}
//querydsl 추가 끝
검증
테스트 용 Entity 생성
- Hello.class
@Entity
@Getter @Setter
public class Hello {

    @Id @GeneratedValue
    private Long id;
}
- QueryDSL compile
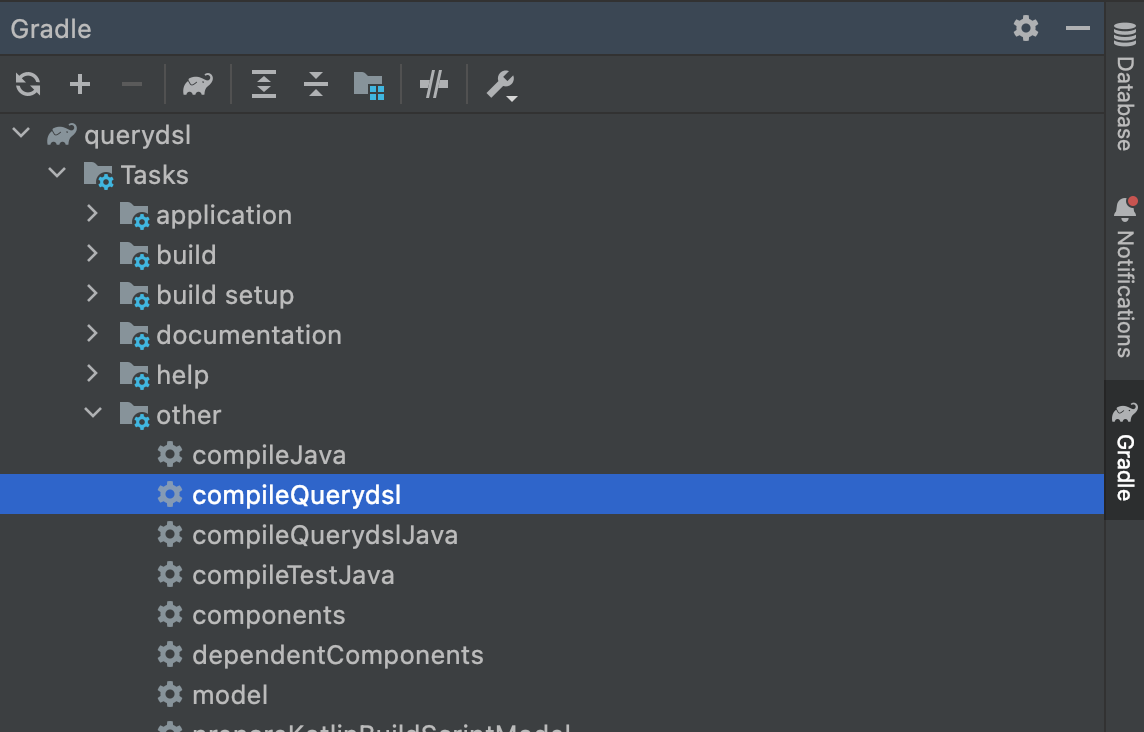
우측 Gradle > Taks > other > compileQuerydsl 더블 클릭으로 컴파일하기

- Q 타입 생성 확인
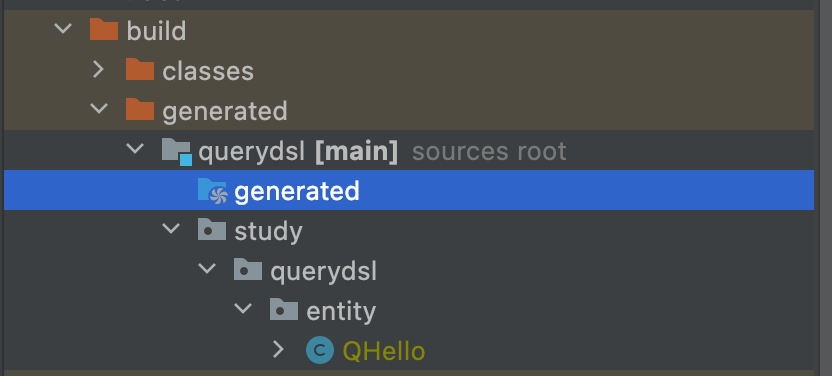
Q 타입이 생성되는 경로는 build.gradle에 아래 코드를 보면 알 수 있다.
def querydslDir = "$buildDir/generated/querydsl"
아까 생성한 Hello 엔티티와 똑같은 패키지와 파일이 하나 생겼다.
- cmd로 빌드하기
// 프로젝트 폴더로 이동 후
./gradlew clean
clean을하면 build 폴더가 통째로 삭제된다.
./gradlew compileQuerydsl
or
./gradlew compileJave
위 명령어를 입력하면 컴파일이 되면서 build 폴더가 새로 생긴다.
! 참고로 Q 파일이 형상 관리(git)에 올라가면 안 된다. 그러므로 형상 관리에 올릴 때 Q 파일이 있는 폴더는 ignore 등으로 제외시키면 된다. !! build 폴더는 기본으로 ignore에 등록되어 있기 때문에 해당 폴더의 하위 폴더에 Q 파일이 생성되는 경로를 지정하면 따로 설정 안 해줘도 되긴 하다.
- Test 코드
@SpringBootTest
@Transactional // 추가
class QuerydslApplicationTests {

   @Autowired EntityManager em;

   @Test
   void contextLoads() {
      Hello hello = new Hello();
      em.persist(hello);

      JPAQueryFactory query = new JPAQueryFactory(em);
      QHello qHello = new QHello("h");

      Hello result = query
            .selectFrom(qHello)
            .fetchOne();

      assertThat(result).isEqualTo(hello);
      assertThat(result.getId()).isEqualTo(hello.getId());
   }
}
JPA와 똑같이 먼저 EntityManager를 Autowired 해준다. Autowired 대신에 @PersistenceContext를 사용해도 된다. 둘의 차이점은 Autowired는 스프링에서만 사용할 수 있고 다른 프레임워크를 사용한다 하면 PersistenceContext를 사용해야 한다는 점이다. 그리고 JPA와는 다르게 Query DSL에서 쿼리와 관련된 코드를 작성할 때 엔티티를 바로 작성하는 게 아니라 Q 타입을 활용해서 작성한다.
그리고 new 연산자를 사용하지 않고 더 간단하게 점 표기법으로 QHello를 활용할 수 있다.
//QHello qHello = new QHello("h");
QHello qHello = QHello.hello;
이 방법이 가능한 이유는 build 폴더 안에 QHello 파일에 static으로 다 만들어놔서 사용이 가능한 것이다.
//QHello.class
public static final QHello hello = new QHello("hello");
아무튼 테스트 코드를 실행해보면 Query DSL과 Lombok이 정상작동 하는 걸 알 수 있다.
반응형
