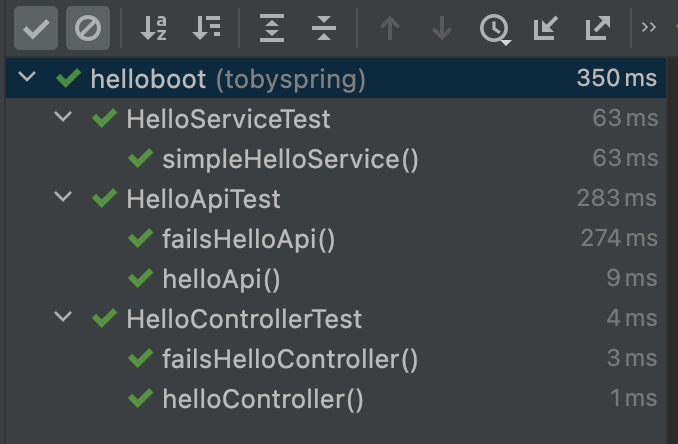
테스트 코드를 이용한 테스트
여태 코드를 작성하면 서버를 재실행하고 인텔리제이 터미널에서 HTTPie로 테스트를 진행했다. 이렇게 사람이 수동으로 테스트를 하는 것보다 테스트 코드를 작성해서 사람보다는 기계?가 테스트하는 게 훨씬 시간도 절약되고 정확성이 높다.
HelloApiTest.java
public class HelloApiTest {

    @Test
    void helloApi() {

    }
}
내용이 빈 메서드를 만들고 실행해보면 테스트가 통과되었다는 표시가 뜬다. 검증할 내용이 없어 테스트가 통과되지 않는 상황이 없기에 몇 번을 돌려도 테스트는 통과된다.

TestRestTemplate.java
@Test
void helloApi() {
    // http localhost:8080/hello?name=Spring
    TestRestTemplate rest = new TestRestTemplate();

    ResponseEntity<String> res = rest.getForEntity("http://localhost:8080/hello?name={name}", String.class, "Spring");

    Assertions.assertThat(res.getStatusCode()).isEqualTo(HttpStatus.OK);
    Assertions.assertThat(res.getHeaders().getFirst(HttpHeaders.CONTENT_TYPE)).startsWith(MediaType.TEXT_PLAIN_VALUE);
    Assertions.assertThat(res.getBody()).isEqualTo("Hello Spring");
}
TestRestTemplate을 사용하여 API 테스트를 쉽게 작성할 수 있다. TestRestTemplate은 RestTemplate의 테스트를 위한 클래스이다.
.getForEntity는 HTTP GET Method이며 그 외 HTTP Method를 제공하는 메서드가 있다. Assertions는 검증을 위한 클래스이다. 검증을 보다 쉽게 할 수 있도록 도와주며 여러 메서드를 제공한다. Assertions를 static import를 사용하면 아래와 같이 간단하게 사용할 수 있다.
import static org.assertj.core.api.Assertions.assertThat;

public class HelloApiTest {
    @Test
    void helloApi() {
    	//...생략
        assertThat(res.getStatusCode()).isEqualTo(HttpStatus.OK);
        assertThat(res.getHeaders().getFirst(HttpHeaders.CONTENT_TYPE)).startsWith(MediaType.TEXT_PLAIN_VALUE);
        assertThat(res.getBody()).isEqualTo("Hello Spring");
    }
}
위 코드를 애플리케이션을 실행 시키고 나서 테스트를 돌려보면 통과된다. 꼭 애플리케이션을 실행 후! 테스트를 돌려야 한다. 나는 바보같이 그것도 모르고 해당 에러를 134224시간 동안 잡고있었다;

DI와 단위 테스트
HelloServiceTest.java
@Test
void simpleHelloService() {
    SimpleHelloService helloService = new SimpleHelloService();
    String ret = helloService.sayHello("Test");
    Assertions.assertThat(ret).isEqualTo("Hello Test");
}
api를 테스트 했었던 코드는 네트워크를 지나다니고 요청과 응답을 받는 과정에서 추가적인 작업들이 필요하기 때문에 속도가 느리다. 위 테스트는 실행해보면 굉장히 빠른 속도로 테스트가 완료된다.
HelloControllerTest.java
@Test
void helloController() {
    HelloController helloController = new HelloController(name -> name);

    String ret = helloController.hello("Test");

    Assertions.assertThat(ret).isEqualTo("Test");
}
검증은 성공하는 테스트 뿐만 아니라 실패일 경우에도 예측하여 검증해야한다. 예를 들면 Controller hello() 메서드에는 objects.requireNonNull() 메서드가 존재하는데, 이 메서드는 입력 값이 null이면 error를 발생시켜주고, null이 아니면 정상적인 실행을 하는 메서드이다. 즉, 입력 값을 null로 넣었을 때 예외가 터지면 검증 성공, 예외가 터지지 않으면 검증 실패이다.
@Test
void failsHelloController() {
    HelloController helloController = new HelloController(name -> name);

    Assertions.assertThatThrownBy(() -> {
        String ret = helloController.hello(null);
    }).isInstanceOf(NullPointerException.class);
}
입력 값이 null이 아니지만 문자열이라 빈 문자열("")이 입력 값으로 들어올 수 있다. 이 부분을 검증하면 테스트는 현재로써는 통과되지 못한다. objects.requireNonNull()은 빈 문자열을 체크해주지 않기 때문이다.
Assertions.assertThatThrownBy(() -> {
    String ret = helloController.hello("");
}).isInstanceOf(NullPointerException.class);
HelloController.java의 로직을 수정해보자. name이 null이거나 빈문자열일 때 IllegalArgumentException()을 터트린다.
public String hello(String name) {
    if(name == null || name.trim().length() == 0) throw new IllegalArgumentException();
    return helloService.sayHello(name);
}
그럼 이제 다시 HelloControllerTest.java로 돌아가 로직 수정을 한다. null의 경우도 NullPointerException()을 터트리는게 아닌 IllegalArgumentException()을 터트리니 수정해준다.
@Test
void failsHelloController() {
    HelloController helloController = new HelloController(name -> name);

    Assertions.assertThatThrownBy(() -> {
        String ret = helloController.hello(null);
    }).isInstanceOf(IllegalArgumentException.class);

    Assertions.assertThatThrownBy(() -> {
        String ret = helloController.hello("");
    }).isInstanceOf(IllegalArgumentException.class);
}
DI를 이용한 Decorator 패턴 (Proxy 생략)
Decorator
@Service
public class HelloDecorator implements HelloService{

    private final HelloService helloService;

    public HelloDecorator(HelloService helloService) {
        this.helloService = helloService;
    }

    @Override
    public String sayHello(String name) {
        return "*" + helloService.sayHello(name) + "*";
    }
}
위와 같이 코드를 작성했을 때 생각해야할 것이 하나 있다. 그럼 HelloController에서는 HelloDecorator와 HelloService 중에 무얼 생성자로 넘겨받아야할까. 일단 현재는 HelloService를 생성자로 넘겨받고있다.
public HelloController(HelloService helloService) {
    this.helloService = helloService;
}
그럼 또 하나 생각할게 생긴다. 그럼 SimpleHelloService는 어디에서 주입할 수 있는 걸까. 방법은
- 명시적인 설정 파일 - HelloController는 HelloDecorator를 주입받고, HelloDecorator는 SimpleHelloService를 주입받으라고 작성하는 방법
- FactoryMethod를 이용해 자바 코드로 Object의 의존 관계의 순서 정해주기
- 우선순위 지정(어노테이션 지정)
제일 쉬운 방법은 우선순위를 지정해주는 것이다. 우선순위를 지정해주는 방법은 애노테이션을 클래스 레벨에 사용하면 된다.
@Service
@Primary
public class HelloDecorator implements HelloService{ ... }
@Primary가 붙은 후보는 우선순위가 제일 높으므로 HelloController에서 HelloDecorator가 선택되어 주입된다. HelloDecorator는 자기 자신을 제외한 나머지 후보는 SimpleHelloService 밖에 없기 때문에 자동적으로 SimpleHelloService가 선택되어 주입되게 된다.
HelloDecorator가 잘 적용되었는지 테스트해보자. HelloApiTest에서 코드를 수정한다.
@Test
void helloApi() {
    // http localhost:8080/hello?name=Spring
    TestRestTemplate rest = new TestRestTemplate();

    ResponseEntity<String> res = rest.getForEntity("http://localhost:8080/hello?name={name}", String.class, "Spring");

    assertThat(res.getStatusCode()).isEqualTo(HttpStatus.OK);
    assertThat(res.getHeaders().getFirst(HttpHeaders.CONTENT_TYPE)).startsWith(MediaType.TEXT_PLAIN_VALUE);
    assertThat(res.getBody()).isEqualTo("*Hello Spring*");
}
전체적으로 테스트를 한 번에 돌려보아도 모든 테스트가 성공한다.

데코레이터가 잘 적용되었는지를 검증하는 단위 테스트도 하나 작성한다.
@Test
void helloDecorator() {
    HelloDecorator decorator = new HelloDecorator(name -> name);
    String ret = decorator.sayHello("Test");
    Assertions.assertThat(ret).isEqualTo("*Test*");
}
데코레이터의 우선순위 방법에는 후보가 두 개일 경우엔 괜찮지만 여러 개일 경우에 복잡하게 우선순위를 매겨야하는 상황이 올 수 있다. 그러므로 데코레이터는 애노테이션을 이용한 우선순위 방식보다는 명시적인 설정 파일로 작성하는 것이 더 좋을 수 있다.
- 출처 : 인프런 토비의 스프링부트 - 이해와 원리 강의